Printed Circuit Boards (PCBs) are at the core of nearly every electronic product, supporting applications across industrial automation systems, medical equipment, telecommunications devices, automotive electronics, and consumer products. As PCB reliability directly affects overall system performance, maintaining their integrity is essential throughout the product lifecycle.
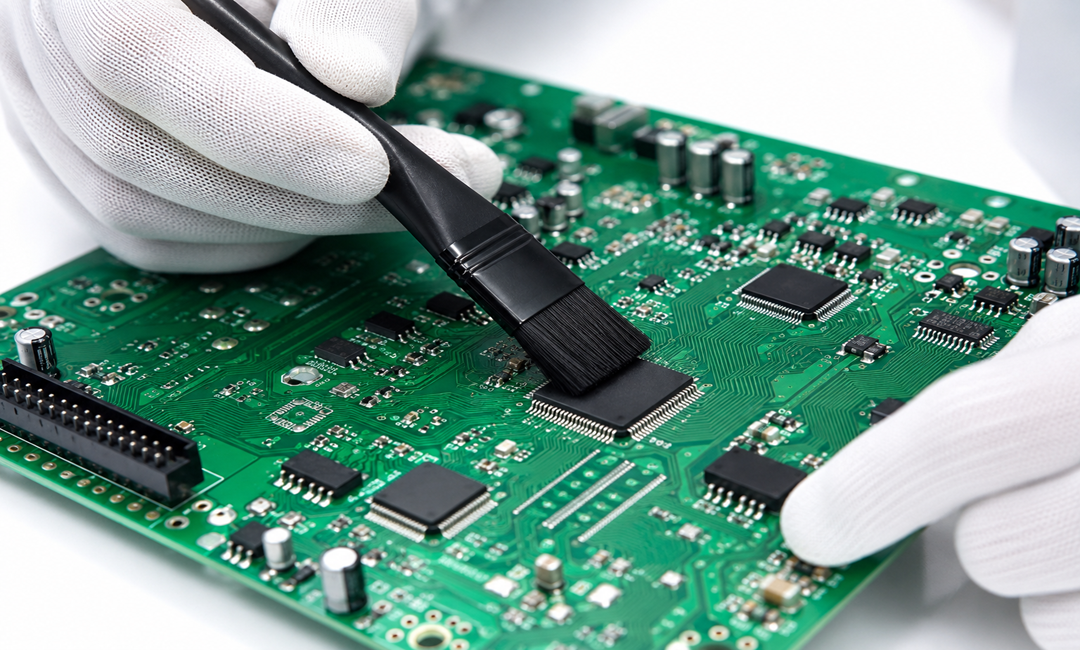
However, even the most well-designed PCBs can experience functional failures or performance degradation due to contamination. Flux residues, dust, moisture, oils, and airborne pollutants can interfere with electrical conductivity, increase corrosion risks, and reduce product lifespan. For this reason, maintaining clean PCB surfaces is a critical part of achieving long-term reliability.
PCB cleaning plays an important role not only during manufacturing and assembly but also in repair and preventive maintenance processes. This guide explains why PCB cleanliness matters, common contaminants, widely used PCB cleaning methods, and the step-by-step PCB cleaning process that helps maintain long-term reliability.
Why PCB Cleaning Matters
PCB contamination should not be left unchecked. In some scenarios, a board may pass testing initially and develop reliability issues later due to residue buildup or environmental exposure. Here are some of the key reasons why PCB cleaning remains essential for long-term performance and reliability:
Prevents Electrical Failures:
Contaminants can create unwanted conductive paths across the PCB surface. This can lead to:
-
- Short circuits between traces
- Signal interference in sensitive circuits
- Leakage currents
- Reduced insulation resistance
In high-density designs, even a small amount of contamination can cause performance issues. This is especially true for boards operating at high voltages or high frequencies.
Improves PCB Reliability and Lifespan:
Clean boards generally remain stable for longer periods. Removing contaminants helps reduce:
-
- Corrosion formation
- Oxidation of exposed metals
- Moisture-related failures
- Premature component degradation
Supports Industry Compliance:
Many industries follow IPC cleanliness standards and internal quality requirements. PCB cleanliness may influence:
-
- Reliability testing outcomes
- Product qualification processes
- Environmental stress testing
- Long-term performance validation
For OEMs producing mission-critical equipment, maintaining. cleanliness standards is a key quality control measure.
Enhances Product Performance:
A clean PCB supports consistent operation. Benefits include:
-
- Stable signal transmission
- Better thermal performance
- Lower maintenance requirements
- Improved system efficiency
Types of PCB Cleaning Methods
There is no single PCB cleaning method suitable for every application. The right cleaning approach depends on factors such as contaminant type, board complexity, component sensitivity, production volume, and cleanliness requirements. Here are some of the most commonly used PCB cleaning methods in electronics manufacturing and maintenance:
- Manual Cleaning: This method uses brushes, lint-free wipes, and solvents applied by hand. It is suitable for spot cleaning, rework, and field repairs. However, results can vary depending on technician technique, making it less consistent and unsuitable for high-volume production.
- Solvent-Based Cleaning: Isopropyl alcohol (IPA) is widely used because it effectively dissolves flux residues and evaporates quickly. Specialized defluxers and other solvents may be required for tougher contaminants. Compatibility with board materials, solder masks, and component markings should always be verified before using aggressive chemicals.
- Ultrasonic Cleaning: High-frequency sound waves generate cavitation bubbles in a liquid bath, helping remove contaminants from hard-to-reach areas. This method is effective for densely populated assemblies but may damage sensitive components such as crystal oscillators, MEMS devices, and certain sensors.
- Aqueous Cleaning: This method uses water-based solutions, often with detergents or saponifiers, to remove flux and residues. Industrial aqueous cleaning systems typically include multiple wash and rinse stages, making the process scalable. Thorough drying is essential to prevent moisture-related issues.
- Vapor Degreasing: This process cleans PCB assemblies by condensing solvent vapor onto the board surface, dissolving contaminants even beneath components. Modern systems use environmentally compliant solvents and leave minimal residue, making this one of the most effective methods for high-reliability applications.
Tools and Materials Used for PCB Cleaning
Successful PCB cleaning depends on selecting appropriate tools and materials. Here are some of the most commonly used tools and materials for effective PCB cleaning:
- PCB Cleaning Solutions: Commercial PCB cleaners are formulated to address specific contaminants. Commercial PCB cleaning agents include Isopropyl Alcohol (IPA), flux removers, defluxers, and multi-purpose electronic cleaners. These must be selected based on:
- Board materials
- Component compatibility
- Contamination type
- Process requirements
- Anti-Static Brushes: Anti-static brushes help remove residue while reducing the risk of electrostatic discharge. They are particularly useful around delicate components and solder joints.
- Lint-Free Wipes: Standard cloths may leave fibers behind. Lint-free wipes help maintain cleanliness while preventing secondary contamination.
- Compressed Air: Compressed air is effective for removing loose dust and debris before wet cleaning begins. Only clean, moisture-free compressed air should be used.
- ESD Protection Equipment: Electrostatic discharge can damage sensitive components invisibly, causing latent failures. Hence, use a complete cleaning setup that should include:
- ESD wrist straps
- Anti-static mats
- Grounded workstations
These precautions help protect sensitive electronics and ensure your safety during handling the boards.
How to Clean a PCB Safely: Step-by-Step Process
Following a structured PCB cleaning process helps reduce risk and improve consistency.
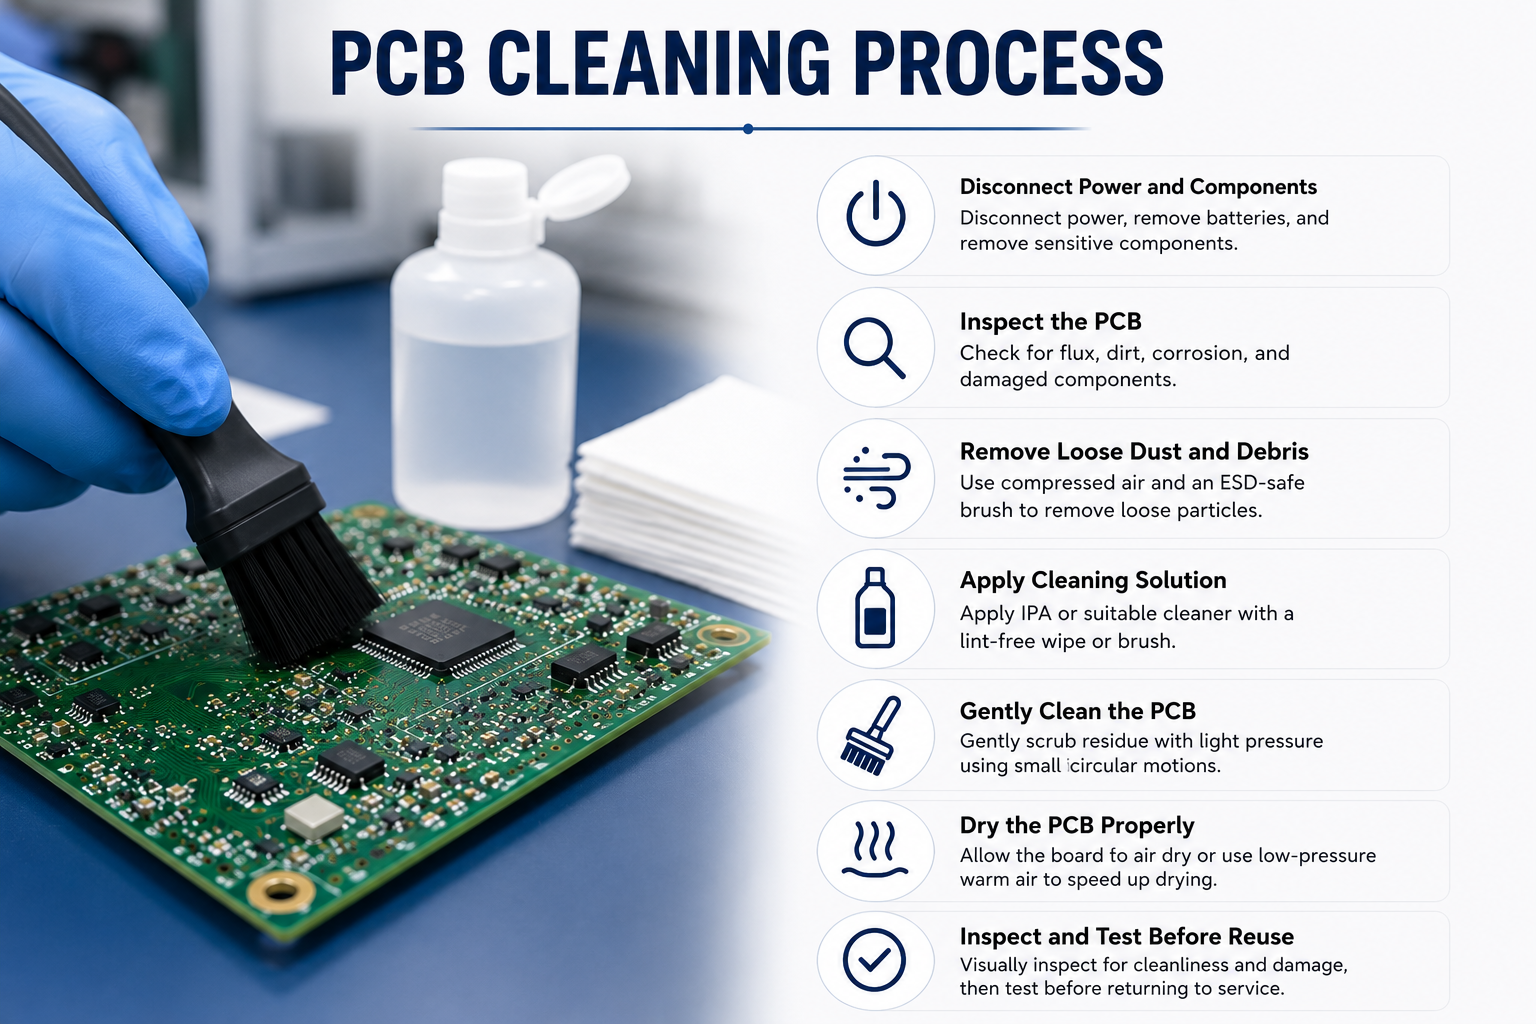
Following are the key steps involved in cleaning a PCB safely:
- Disconnect Power and Components: Before cleaning, disconnect the PCB from power sources and remove batteries if present. Allow capacitors time to discharge and remove any socketed components that may be sensitive to cleaning solvents.
- Inspect the PCB: Examine the board to identify the type and location of contamination. Check for damaged components, cracked solder joints, or lifted pads. This assessment helps determine the most suitable cleaning approach.
- Remove Loose Dust and Debris: Use filtered compressed air to remove loose particles from the surface. Follow with an ESD-safe brush to clear debris trapped between components.
- Apply Cleaning Solution: Apply IPA or an appropriate cleaning solvent in controlled amounts. For localized cleaning, apply the solvent to a brush or lint-free wipe. Avoid excessive solvent accumulation around components.
- Gently Scrub Residue: Use light pressure and small circular motions to remove residue. For heavier deposits, allow the solvent to sit briefly before brushing. Be careful around components and connector pins.
- Dry the PCB Properly: Allow the board to dry thoroughly before testing or reinstallation. Where needed, low-pressure warm air or a controlled drying system can help accelerate the process.
- Inspect Before Reuse: Conduct a final visual inspection to confirm residue removal and check for any signs of damage. Functional testing can help verify proper operation before returning the board to service.
Special Cleaning Considerations for Different PCB Types
Cleaning considerations differ depending on the type of board. Following are some important cleaning considerations for different PCB types:
- Rigid PCBs: Standard FR4 rigid boards generally withstand most cleaning methods well. Common concerns include flux residue, dust, and industrial contaminants.
- Flexible PCBs: Flexible circuits, typically made from polyimide, are sensitive to mechanical stress and certain solvents. Avoid harsh scrubbing that may crease or crack the material, and verify solvent compatibility to prevent damage to adhesives or the substrate.
- Rigid-Flex PCBs: Combining rigid and flexible sections, these boards require careful cleaning of transition areas to avoid mechanical stress. Solvent immersion should only be used if the design has been validated for such exposure.
- HDI PCBs: High-Density Interconnect boards feature fine traces, microvias, and densely packed components, requiring precision cleaning. Ultrasonic cleaning can be effective, provided component compatibility is confirmed.
- PCB Assemblies with Sensitive Components: Connectors, sensors, and MEMS devices may not tolerate solvents or mechanical agitation. Protect sensitive parts during cleaning or use targeted manual cleaning for mixed-component assemblies.
From removing flux residues during assembly to preventing contamination-related failures in the field, the right cleaning practices help protect PCB performance throughout the product lifecycle. Just as proper cleaning helps minimize contamination risks and supports long-term performance, the quality of the PCB itself also plays an equally important role.
At Rigiflex Technology, we focus on delivering precision-built rigid, flexible, and rigid-flex PCB solutions designed to meet the performance, reliability, and contamination control demands of modern electronic applications.
Frequently Asked Questions (FAQs)
1. Can I clean a PCB with 70% isopropyl alcohol?
Yes, although 90% to 99% IPA is generally preferred because it contains less water and evaporates faster.
2. Is ultrasonic cleaning safe for all PCBs?
No. Some components may be sensitive to ultrasonic energy and should be evaluated before cleaning.
3. How long should a PCB dry after cleaning?
Allow at least 30 minutes of air drying after IPA-based cleaning. For assemblies with trapped solvent under components, few more hours may be needed.
4. Can water damage a PCB during cleaning?
Yes, if the board is powered or if residual moisture is not fully removed before operation. Aqueous cleaning is viable, but only with thorough rinsing and complete drying.